
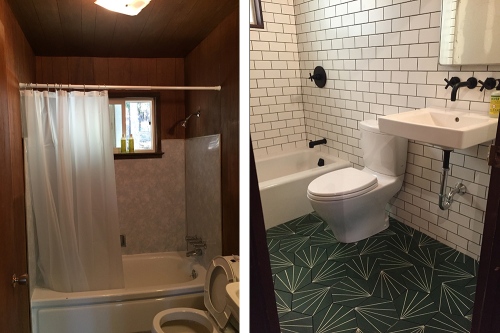
 from earlier 2017: ah, that 60s-paneling enclosed bathroom – so cozy when you’re doing your thing, smells great when the shower hits it, probably harbors zero germs – butttt, we decided to tear it out and tile the room. plus the floor was soggy and the toilet would tilt when you sat on it.
 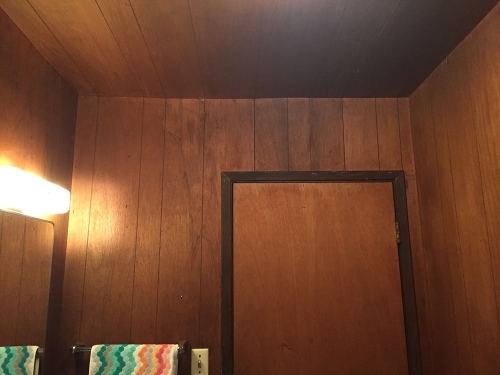 i appreciate that the grooves align perfectly, and that everything is brown, brown, brown, (it is a bathroom after all). as we know from the previous demo, a wonderful pine ceiling is hidden above the paneling. so down it went.
 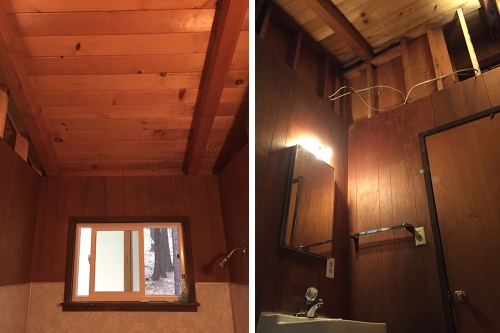 see? much nicer already, with the ceiling gone. adds good height to the room. Below, we next tackled the floor. A couple layers of linoleum and then the subfloor. The floor framing of this cabin is 4×6 @ 48″ o.c., and the toilet needed some additional new framing below it. we brought in a contractor friend for this ‘heavy lifting’ work.


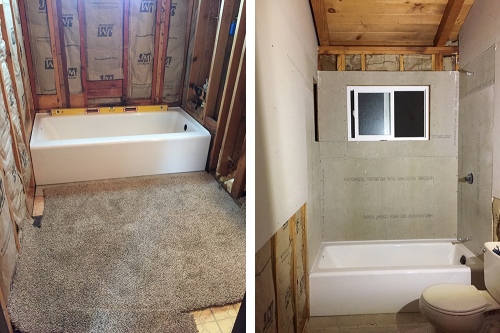 we slid the new tub – Kohler Bellwether – into place on a piece of carpet, much better than lifting! the cast iron tub weighed 300lbs! and did a good job of weighing down our truck in the snow. we chose this over an acrylic tub because they retain heat better and i read that acrylic can crack – although i’ve never heard of this from any clients. meanwhile, we did find time to break away and hit the slopes at nearby Bear Valley in the continuous epic snowfall:
  it was the most snow in many years and hoping for more this winter!
 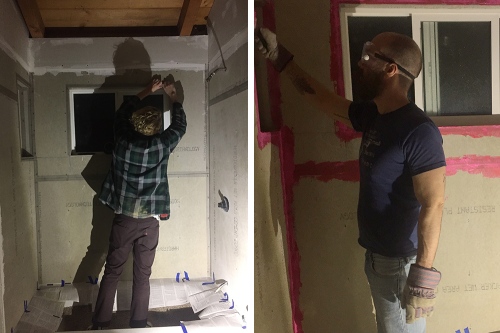 now that the tub was in and hardie backerboard installed, time to start prepping for tile install. *disclaimer, this is an informal blog, NOT an instructional story – do not try any of this at home!! we’re not experts! DIY DIY keep reading below for tile fun 🙂
 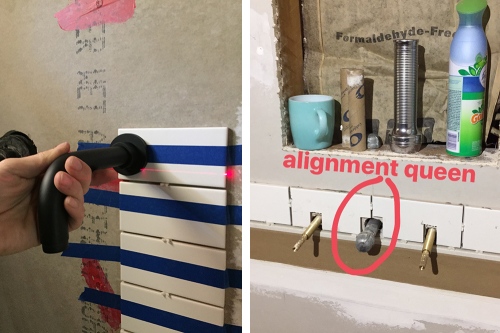 being that we like alignment, the entire bathroom tile layout was based on the location of a grout line in the center of the sink faucet….OCD much? sure, but i’ll feel better looking at it than if it was offcentered… we started with the faucet and ran the tile all the way back over to the tub area.
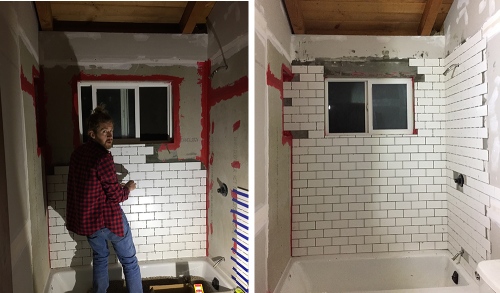 day and night, we put each 3×6 tile in place with 1/8″ spacers. in hindsight, and for future ref, i would use a smaller spacer: 1/8″ ends up fatter once the grout fills out. the tiles above the window were torn out and redone 2 or 3 times…and there were just as many meltdowns…the spacing and the levelness of it was screwed up, but we got it to work eventually. UGH!!
 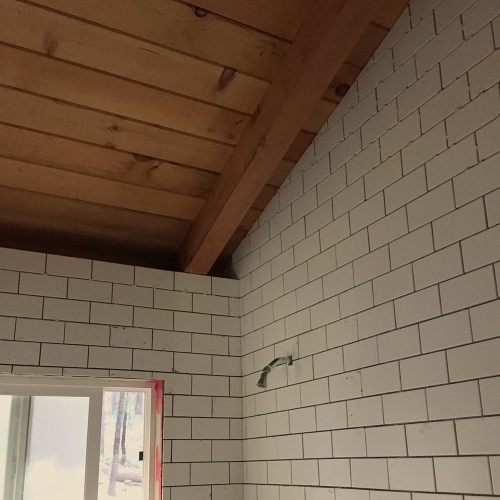 brrrr…all winter long cutting those tiles outside. we extended the tile all the way up the ‘wet wall’ behind the fixtures. i prefer it that way, looks cleaner and more architectural. luckily we got a full tile at the top where it hit the rafters (well, the secret is we did use a chisel on the rafters – gently – to make sure the tiles fit…our engineer said the house will not cave in)
 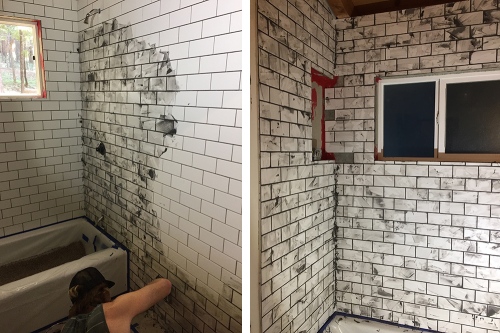 then time for grouting. we chose ‘Dusty Grey’ by Laticrete. the wet mix is much darker than the finished, dried product, and i think we could have gone darker. next time! grout is A BITCH, btw. not easy. our consistency may have been off. i heard everything from ‘mashed potatoes’ to ‘peanut butter’….who knows. a paddle mixer on an electric drill made the second batch a breeze. a small shovel for the first batch = not fun.
 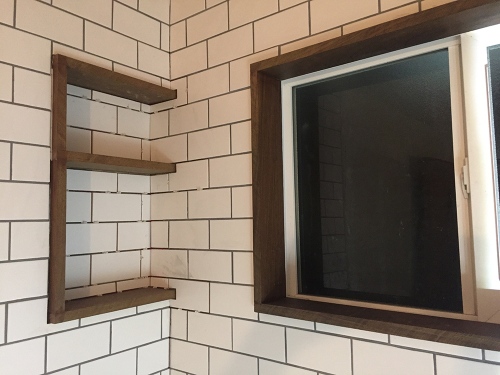 working around the niche and the window was a challenge with various tile sizes and shapes. we wrapped these elements with ipe wood, with an oil finish only. ipe is used for exterior decks, so this will hold up just fine in the shower. it’s not cheap stuff, but it was worth it for this bit of wood accent. in the end, we may end up replacing that nasty vinyl window, it’s fine for inside the shower, but….it’s vinyl. all others in the house are going away.
 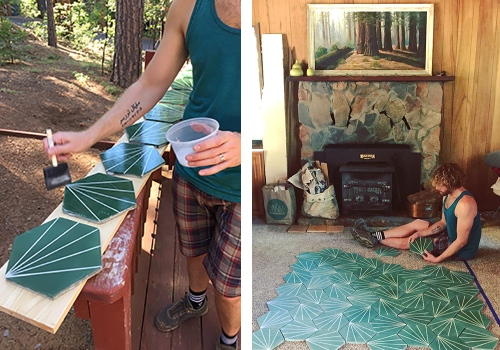 we chose this pattern and color of cement from Original Mission Tile for the flooring because it reminds us of the giant pine needles that the cabin is surrounded by:
 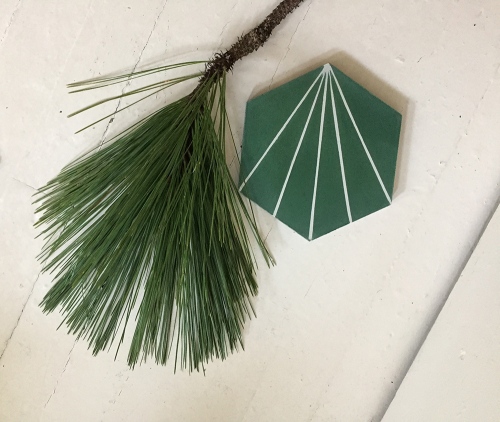 we reused the old vanity light fixture and medicine cabinet – spraypainted the inside orange. we added a fan to vent the space.
 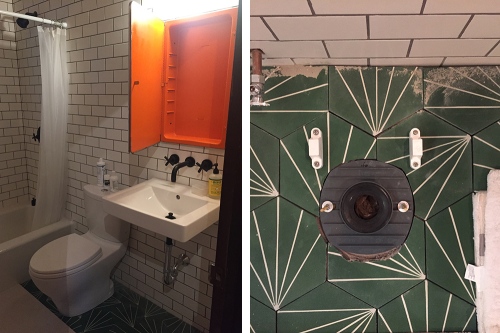 the California Faucets matte black fixtures, American Standard sink and Toto Aquia toilet were the last things to go in – the toilet about 5 minutes before weekend guests arrived! dual-flush options so we can save water and our septic tank 😉 at this point the bathroom is about 95% finished and we’ve moved on to other projects. we still have to paint the nontiled walls, spraypaint that p-trap black, finish some grout and some caulk here and there, and put in a light fixture at the top of the wall. stay tuned – more to come!

I was one of the first to use this bathroom…and it was delightful.
ha! true you were. thanks for not clogging it UP
It’s spectacular!